A Sandless floor refinishing solution for the Do It Yourself Homeowner
These floors were covered with carpet for years and when the carpet was pulled up, they were in rough shape. Refinishing floors can be expensive, time consuming and extremely dusty. Finding the Varathane Renewal Floor Finishing Kit was hidden gem.

While living here, we wanted an alternative solution as we just finished dusting the entire house because of some sheetrock work. If you are fortunate enough to not live in the house while floors are being refinished, I would take that approach. Living through a floor refinishing is challenging because no matter what you do, dust just gets everywhere. Zipwall is something I have found useful when trying to manage dust and dirt.
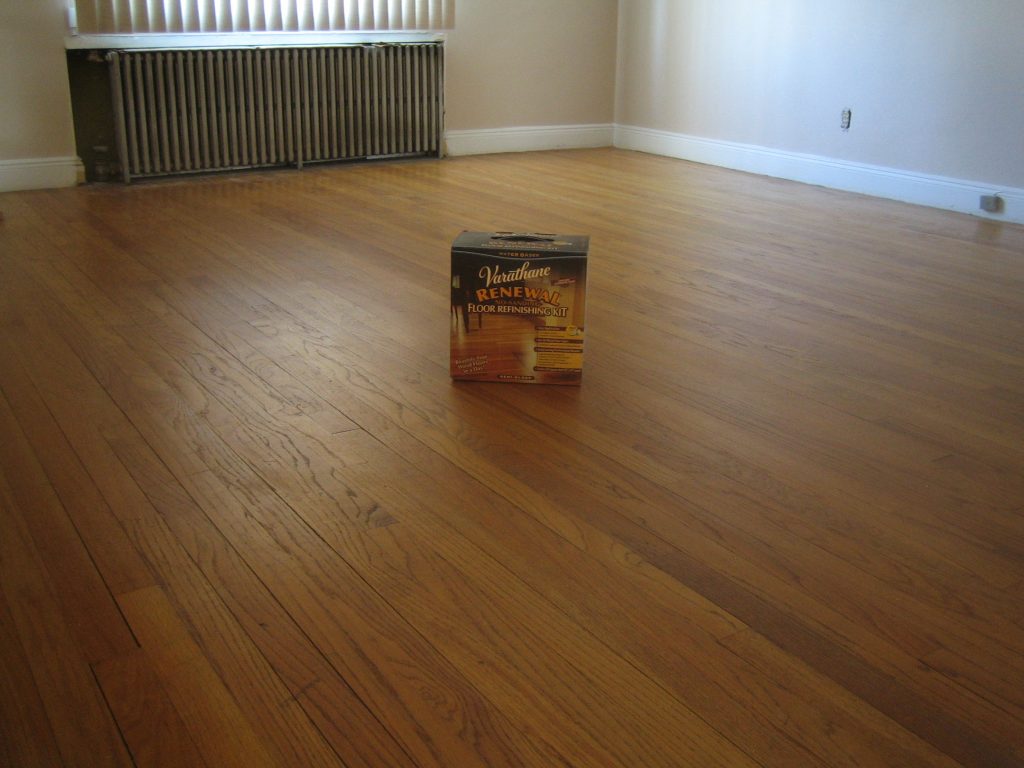
The house layered in dust was not the path to take and while doing research, I came across Varathane Renewal Floor Finishing Kit system. Right off the shelf, this looked like a good solution to help breath some life into the floors.
Now our floors were in rough shape, but they were decent enough to consider Varathane’s system.

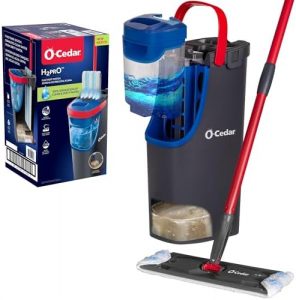
The Varathane Kit
The kit comes with a gallon of renewal, a cleaner solution, a block to apply the cleaner and renewal, the pads needed for both steps and a DVD. I didn’t bother with the DVD because the written instructions were really well done.
You will need to have a standard threaded broom stick, a paint tray or two, a bucket, soap, rags and towels for cleaning and washing.
Here is a Step-by-Step Guide for a DIY
Prepping the Floors
At first you need to clean the floors as best as possible with a vacuum and floor cleaner. I just used some Mr. Clean with water and mopped the entire floor. You want to patch up and repair any sections at this point because it will show once the finish is applied and dried.
So I pulled up all of the staples and any major imperfections that would show up. I did leave some small marks depending on their location because when I hand sanded a few spots, it changed the color and I did not want to bother staining it to match.
Take the similar approach you would when prepping for painting. Good prep will yield good results.
Cleaning the Floors
Once you have the floor prepped, It is time to use the included cleaner to clean the floor again. This is a 32oz bottle which allowed me to do 2 rooms and our small hallway. Simply wrap the cleaning pad around the wooden block, tighten the wingnuts on the block and start cleaning the floor as if you were scrubbing it.
Focus on a 4’x8’ section at first and make sure the area doesn’t dry. After you apply and scrub the section with the cleaner, you go over it with some wet rags to remove the residue.

Keep going until you complete the room. Rinse out the rags as you go along to clean off the residue. Clean the pad with hot water and set it aside.
“Rinse” the Floors
You simply clean the entire floor again with some soap and hot water again. I mopped the entire floor (while changing water in between) to make sure the rest of the cleaner was removed and the floor. I dried the floors with some towels and then let the rest air dry.
Ventilation
I would advise opening the windows and keeping a fan going. Even though this has low VOCs and low smell, it’s better just to get the air flowing. This was done in November during a string of relatively warm days. The windows were opened a few inches for a couple of days.
Applying the Floor Finish
The one gallon bucket says it will cover 225 Sq/ft (about a 15’x15’ room). I was not sure how much this would cover, so I started with a room that is 225 Sq/ft with the intention to doing 2 coats. I figured if I ran out, I can get another kit for the other room and hallway.
Once the cleaning step is done, it is time to move to the Varathane refinisher. You use a different applicator pad for this stage. When you initially apply it, it leaves a milky film. The instructions say to leave it and I was a little skeptical here, but trusted it would work out. Again working in 2′ by 4′ sections, it goes quickly.
I barely put a dent in the one gallon bucket, so I proceeded to the hallway and other main room starting with the cleaner and then the finish coats. I was able to do 2 coats on about 400 sq ft with some to spare, so I did a 3rd coat on a few higher traffic areas. I did really light coats.
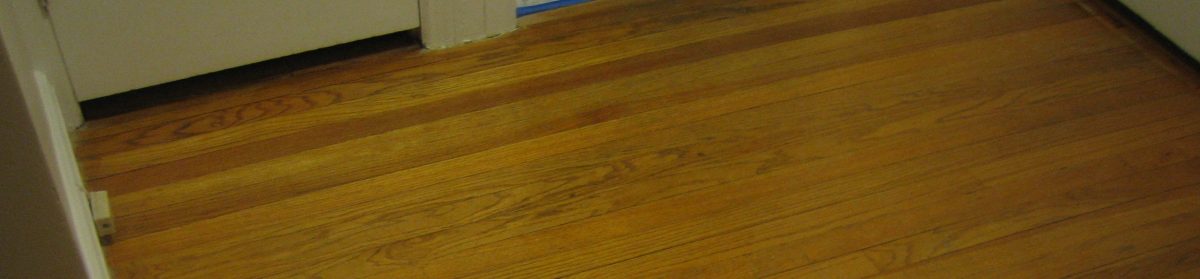
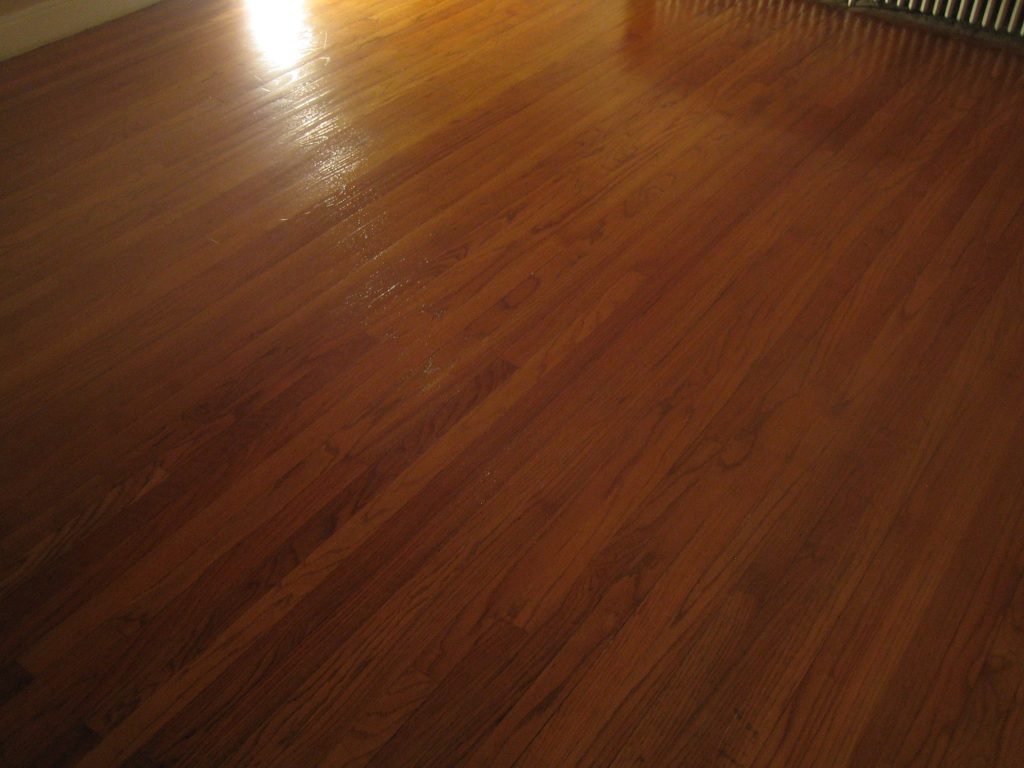
After a couple of days of airing out and drying, the floors looked great. The pictures here do not do it justice.
This is a Semi-Gloss which held up really well for 10 years. It is beyond 10 years and I am looking to do the same system. Just need to get the family out of the house : )
The Varathane Renewal Bottom Line:
If you are looking for an alternative to refinishing “ok” floors, take a good
look at the Varathane Renewal Floor Finishing Kit. It was a lot easier than I thought. (The rebranded kit is by Rustoleum)
This is also a good kit to use if you have a rental and just want to spruce up the floors a little bit.
If you can clean a floor with a sponge mop, you can do use this system.
You just need to spend some time planning and air out the rooms.
Thanks for reading,
Scottie